Hacking the bq, Part 2: Factory Mode
UPDATE 5.5.2015: Thanks to Simos Xenitellis for finding out how the WiFi test works.
The bq Aquaris E4.5 Ubuntu Edition has a “hidden” Factory Mode. You can access it by doing the following:
- Power off the device
- Press the POWER and VOLUME DOWN buttons for more than ten seconds. The device will boot while you press the buttons, so keep pressing!
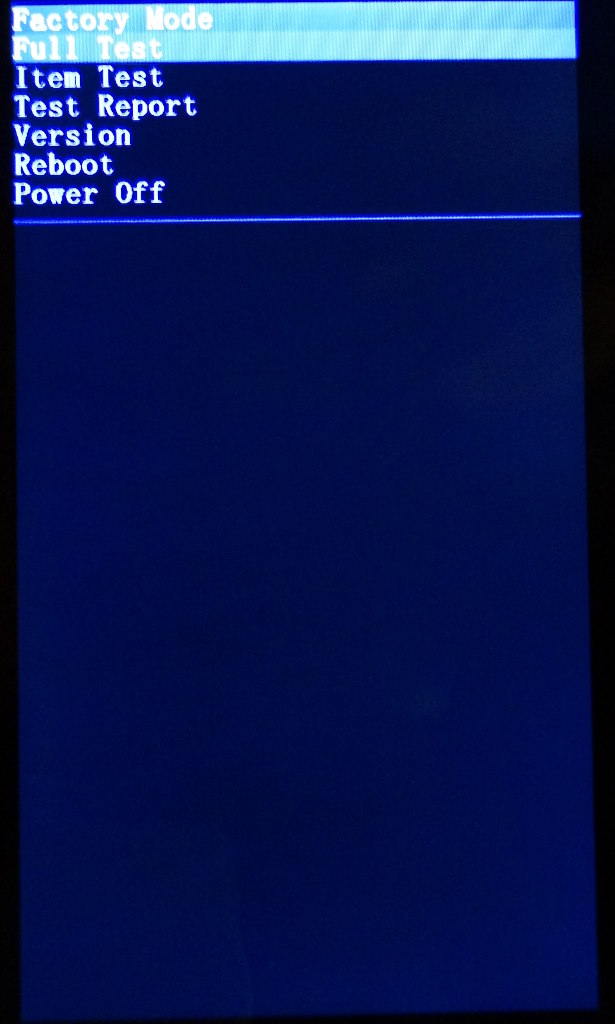
The following menu will be shown:
- Full Test
- Item Test
- Test Report
- Version
- Reboot
- Power Off
You can select an option using the VOLUME UP and VOLUME DOWN buttons, and execute it using by pressing the POWER button. You can exit from a sub-menu by pressing the VOLUME UP button for a couple of seconds. If you see a blue bar with options on the bottom of the screen, a POWER button press will select the option in the middle and a long press on the VOLUME UP button will select the option on the right, usually labeled “Back”.
Item test
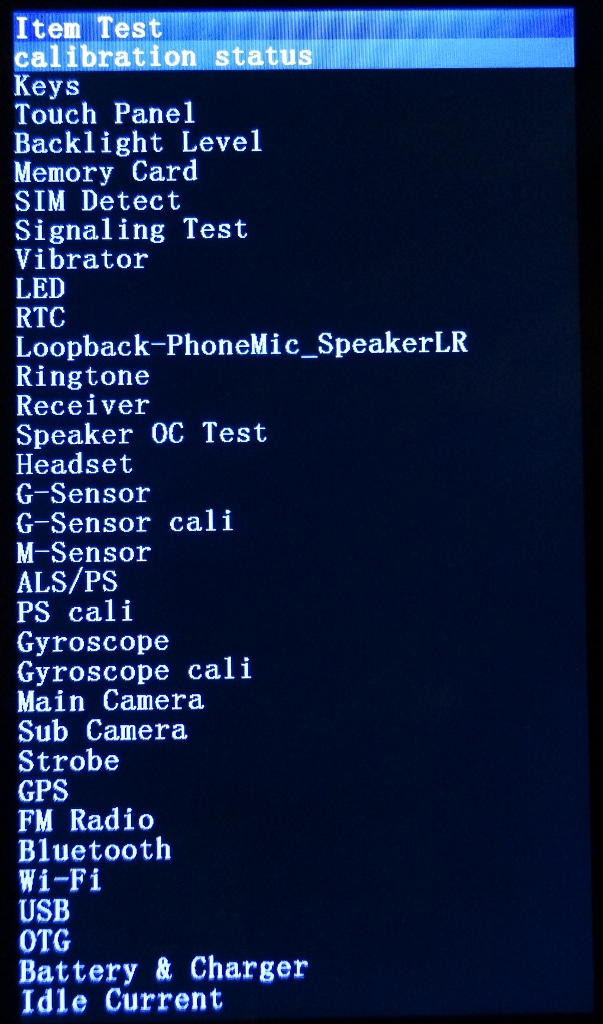
This option will offer you manual tests of the device hardware. Each test is for a specific hardware item, e.g. the touch screen, the backlight or the modems, and after the test you can select “Test Pass” or “Test Fail”. The results of your answers will be shown in a report later.
The following tests are currently offered on my device:
- calibration status
- Keys: Will test the three hardware buttons.
- Touch Panel: Will run through several touch panel tests, you have to touch every red box to turn it green.
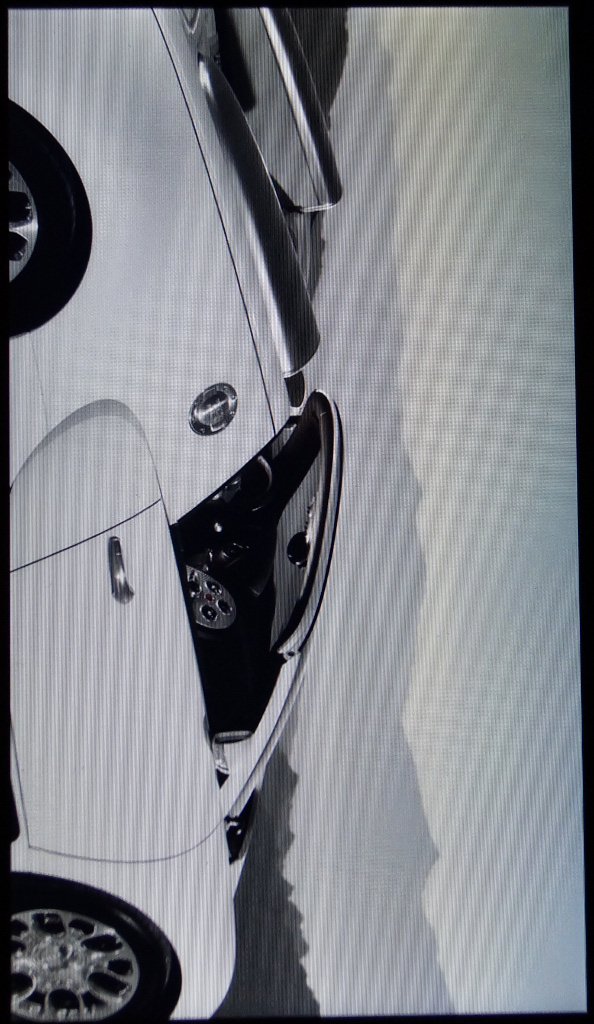
- Backlight Level: Displays several images, switch through them using the volume buttons.
- Memory Card: Detects internal and external flash memory and the detected capacity.
- SIM Detect: Tests both SIM slots for detected SIM cards.
- Signaling Test: You can start an emergency call. Probably not a good idea.
- Vibrator: The phone vibrates until one of the two Pass/Fail options is selected.
- LED: You can turn on the LED in different colors.
- RTC: Sets the clock to a couple seconds before midnight, and when it passes midnight, the alarm goes off. Pretty loud!
- Loopback-PhoneMic_SpeakerLR: Tests audio loopback. Very loud!
- Ringtone: Plays an annoying beep through the speakers, very loud!
- Receiver: Plays an annoying beep through the small ear speaker.
- Speaker OC Test: Plays an annoying beep through the speakers, very loud!
- Headset: You can play the annoying beep through the headset or test headset microphone loopback. Requires a plugged-in headset.
- G-Sensor: Displays the current gravity sensor values. If you put the phone on a table, the third value should be around +9.81. If you put the telephone in different positions, the status of each axis will change from “in testing” to “pass”.
- G-Sensor cali: You can calibrate the gravity sensor.
- M-Sensor: Displays the current magnetical sensor values. As you turn the phone around its axes, the values will change. The value for Y was about 25 when I put the phone on a table and pointed it north.
- ALS/PS: Shows the ambient light sensor (ALS) and proximity sensor (PS) values. Try moving your hand closer to the two sensors right near the receiver. If I cover both sensors with my hand, the ALS reports 0h (dark) and the PS goes up to 3FFh (near).
- PS cali: Cover the PS with your hand and select “Do calibration”. After that the value should be 0 when there is nothing in front of it and 1023 if the sensor is covered.
- Gyroscope: Displays the current gyroscope (rotation speed) sensor values.
- Gyroscope cali: Allows one to calibrate the gyroscope. I think this needs an actual mechanical testbench to be accurate.
- Main Camera: Take a picture using the main camera.
- Sub Camera: Take a picture using the front-facing sub camera.
- Strobe: Flashes the LED strobe.
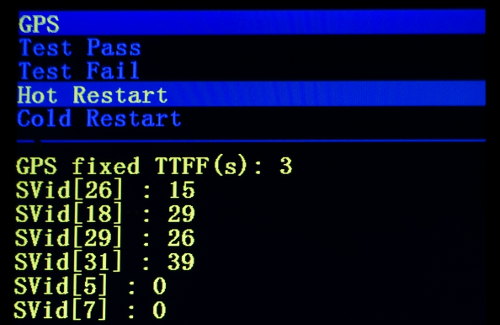
- GPS: Tries to get a GPS fix and allows to restart the GPS in “Hot” or “Cold” mode. Obviously doesn’t use A-GPS, it took about 190 seconds to get a fix on my first try. When a fix is acquired, the string “fixed” is shown and the “TTFF(s)” value stops updating, see the screenshot below.
- FM Radio: Tunes the FM radio to 88, 98.7 or 108 MHz if the headset is plugged in.
- Bluetooth: Will initialize Bluetooth and start a scan for nearby devices.
- Wi-Fi: Starts the WiFi module and starts scanning for open accesspoints, then connects to the first one it finds.
- USB: Checks if the USB port is connected in slave mode.
- OTG: Displays the current USB-On-the-Go status, e.g. if the device is acting as a slave or a host.
- Battery & Charger: Displays extensive information about the battery and charger, e.g. voltage, temperature, current and PMIC chip status.
- Idle current. The screen just goes blank after a few seconds and the menu comes back again after a button press. Maybe it puts the phone to sleep so the idle current can be measured using (external) equipment?
This is a screenshot of the GPS test:
These are some of the test pictures for “Backlight Level”:



Full Test
This will just run through all tests one after the other. It takes quite long.
Test Report
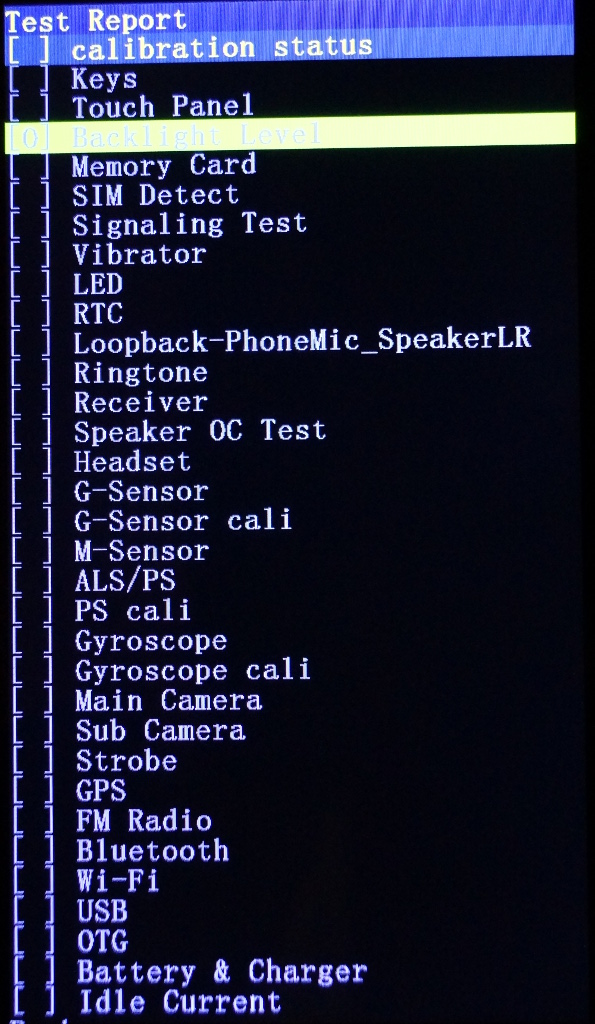
Lists all previous answers to all tests. A “Test Pass” will result in a green entry, a “Test Fail” in a red one. Unanswered tests are black.
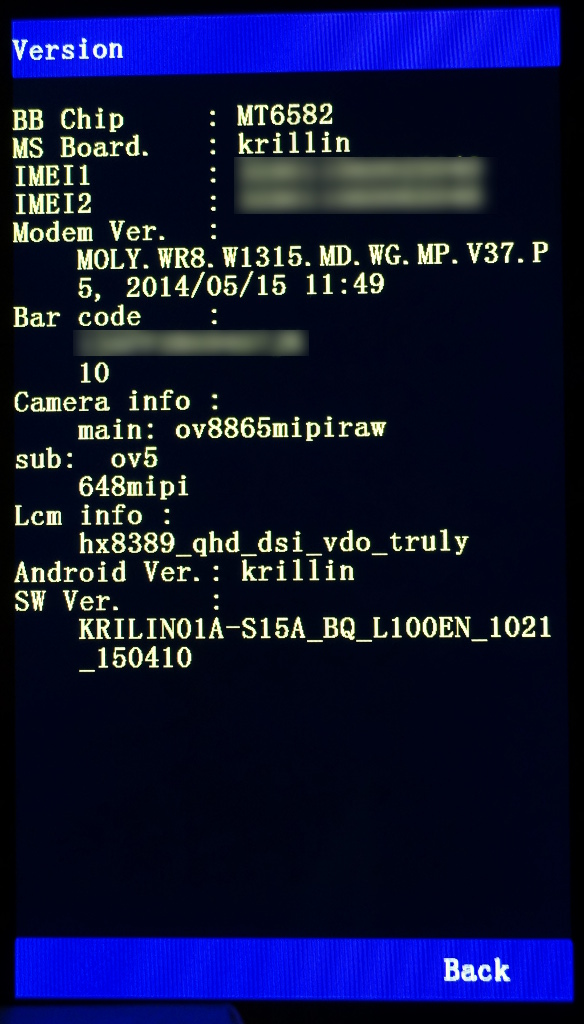
Version
Displays the hardware/software versions of various components and the modem IMEIs. On my device the information is as follows:
BB chip     : MT6582
MS Board.   : krillin
IMEI1       : <censored>
IMEI2       : <censored>
Modem Ver.
    MOLY.WR8.W1315.MD.WG.MP.V37.P
    5, 2014/05/15 11:49
Bar code    :
    <censored>
    10
Camera info :
    main: ov8865mipiraw
sub:  ov5
    648mipi
Lcm info :
    hx8389_qhd_dsi_vdo_truly
Android Ver.: krillin
SW Ver.     :
    KRILIN01A-S15A_BQ_L100EN_1021
    _150410
USB interface
While in Factory mode, the phone shows up with the following profile on the USB bus:
Bus 003 Device 003: ID 0bb4:0005 HTC (High Tech Computer Corp.)
Device Descriptor:
  bLength                18
  bDescriptorType         1
  bcdUSB               2.00
  bDeviceClass            0 (Defined at Interface level)
  bDeviceSubClass         0
  bDeviceProtocol         0
  bMaxPacketSize0        64
  idVendor           0x0bb4 HTC (High Tech Computer Corp.)
  idProduct          0x0005
  bcdDevice            2.16
  iManufacturer           2 BQ
  iProduct                3 Aquaris_E4.5
  iSerial                 4 <removed>
  bNumConfigurations      1
  Configuration Descriptor:
    bLength                 9
    bDescriptorType         2
    wTotalLength          121
    bNumInterfaces          4
    bConfigurationValue     1
    iConfiguration          0
    bmAttributes         0xc0
      Self Powered
    MaxPower              500mA
    Interface Descriptor:
      bLength                 9
      bDescriptorType         4
      bInterfaceNumber        0
      bAlternateSetting       0
      bNumEndpoints           2
      bInterfaceClass         8 Mass Storage
      bInterfaceSubClass      6 SCSI
      bInterfaceProtocol     80 Bulk-Only
      iInterface              1 Mass Storage
      Endpoint Descriptor:
        bLength                 7
        bDescriptorType         5
        bEndpointAddress     0x81  EP 1 IN
        bmAttributes            2
          Transfer Type            Bulk
          Synch Type               None
          Usage Type               Data
        wMaxPacketSize     0x0200  1x 512 bytes
        bInterval               0
      Endpoint Descriptor:
        bLength                 7
        bDescriptorType         5
        bEndpointAddress     0x01  EP 1 OUT
        bmAttributes            2
          Transfer Type            Bulk
          Synch Type               None
          Usage Type               Data
        wMaxPacketSize     0x0200  1x 512 bytes
        bInterval               1
    Interface Descriptor:
      bLength                 9
      bDescriptorType         4
      bInterfaceNumber        1
      bAlternateSetting       0
      bNumEndpoints           2
      bInterfaceClass       255 Vendor Specific Class
      bInterfaceSubClass     66
      bInterfaceProtocol      1
      iInterface              0
      Endpoint Descriptor:
        bLength                 7
        bDescriptorType         5
        bEndpointAddress     0x82  EP 2 IN
        bmAttributes            2
          Transfer Type            Bulk
          Synch Type               None
          Usage Type               Data
        wMaxPacketSize     0x0200  1x 512 bytes
        bInterval               0
      Endpoint Descriptor:
        bLength                 7
        bDescriptorType         5
        bEndpointAddress     0x02  EP 2 OUT
        bmAttributes            2
          Transfer Type            Bulk
          Synch Type               None
          Usage Type               Data
        wMaxPacketSize     0x0200  1x 512 bytes
        bInterval               0
    Interface Association:
      bLength                 8
      bDescriptorType        11
      bFirstInterface         2
      bInterfaceCount         2
      bFunctionClass          2 Communications
      bFunctionSubClass       2 Abstract (modem)
      bFunctionProtocol       1 AT-commands (v.25ter)
      iFunction               7 CDC Serial
    Interface Descriptor:
      bLength                 9
      bDescriptorType         4
      bInterfaceNumber        2
      bAlternateSetting       0
      bNumEndpoints           1
      bInterfaceClass         2 Communications
      bInterfaceSubClass      2 Abstract (modem)
      bInterfaceProtocol      1 AT-commands (v.25ter)
      iInterface              5 CDC Abstract Control Model (ACM)
      CDC Header:
        bcdCDC               1.10
      CDC Call Management:
        bmCapabilities       0x00
        bDataInterface          3
      CDC ACM:
        bmCapabilities       0x02
          line coding and serial state
      CDC Union:
        bMasterInterface        2
        bSlaveInterface         3
      Endpoint Descriptor:
        bLength                 7
        bDescriptorType         5
        bEndpointAddress     0x84  EP 4 IN
        bmAttributes            3
          Transfer Type            Interrupt
          Synch Type               None
          Usage Type               Data
        wMaxPacketSize     0x000a  1x 10 bytes
        bInterval               9
    Interface Descriptor:
      bLength                 9
      bDescriptorType         4
      bInterfaceNumber        3
      bAlternateSetting       0
      bNumEndpoints           2
      bInterfaceClass        10 CDC Data
      bInterfaceSubClass      0 Unused
      bInterfaceProtocol      0
      iInterface              6 CDC ACM Data
      Endpoint Descriptor:
        bLength                 7
        bDescriptorType         5
        bEndpointAddress     0x83  EP 3 IN
        bmAttributes            2
          Transfer Type            Bulk
          Synch Type               None
          Usage Type               Data
        wMaxPacketSize     0x0200  1x 512 bytes
        bInterval               0
      Endpoint Descriptor:
        bLength                 7
        bDescriptorType         5
        bEndpointAddress     0x03  EP 3 OUT
        bmAttributes            2
          Transfer Type            Bulk
          Synch Type               None
          Usage Type               Data
        wMaxPacketSize     0x0200  1x 512 bytes
        bInterval               0
Device Qualifier (for other device speed):
  bLength                10
  bDescriptorType         6
  bcdUSB               2.00
  bDeviceClass            0 (Defined at Interface level)
  bDeviceSubClass         0
  bDeviceProtocol         0
  bMaxPacketSize0        64
  bNumConfigurations      1
Device Status:     0x0001
  Self Powered
The USB ID is different than the normal one. So the device seems to be produced by HTC for bq and exports two devices: an USB storage class device labeled “Linux File-CD Gadget”, and an ACM serial communication device. The storage device cannot be mounted in my setup, it fails with “no medium found on /dev/sdc”. The ACM device is recognized by ADB and can be used if the ADB server is started as root, or if the access rights to the USB device are set correctly (e.g. using an udev rule).
Now let’s open an ADB shell while the phone is in factory mode:
sturmflut@fire:~$ sudo adb shell

root@krillin:/ # uname -a
Linux localhost 3.4.67 #1 SMP PREEMPT Wed Apr 8 16:25:56 BST 2015 armv7l GNU/Linux

root@krillin:/ # cat /proc/cmdline
console=ttyMT0,921600n1 vmalloc=496M slub_max_order=0 fixrtc lcm=1-hx8389_qhd_dsi_vdo_truly fps=6658 bootprof.pl_t=478 bootprof.lk_t=1660 printk.disable_uart=1 boot_reason=0 datapart=/dev/mmcblk0p7 systempart=/dev/mmcblk0p6 androidboot.serialno=<censored> lcm=1-hx8389_qhd_dsi_vdo_truly fps=6658 bootprof.pl_t=478 bootprof.lk_t=1660 printk.disable_uart=1 boot_reason=0 datapart=/dev/mmcblk0p7 systempart=/dev/mmcblk0p6 androidboot.serialno=<censored>
I have no idea why some of the parameters appear twice in the cmdline.
Looks like the device booted the default kernel, but boot_reason=0 instead of the boot_reason=4 on normal startup.
Let’s look at the process list:
root@krillin:/ # ps
USER     PID   PPID  VSIZE  RSS     WCHAN    PC         NAME
root      1     0     564    376   c01594fc 0001bfac S /sbin/init
root      2     0     0      0     c00695fc 00000000 S kthreadd
root      3     2     0      0     c004ef5c 00000000 S ksoftirqd/0
root      5     2     0      0     c00637c0 00000000 S kworker/u:0
root      6     2     0      0     c00c50f8 00000000 S migration/0
root      16    2     0      0     c00635b0 00000000 S khelper
root      17    2     0      0     c0345594 00000000 S kdevtmpfs
root      18    2     0      0     c00635b0 00000000 S netns
root      19    2     0      0     c00635b0 00000000 S fs_sync
root      20    2     0      0     c00635b0 00000000 S suspend
root      21    2     0      0     c0120e64 00000000 S sync_supers
root      22    2     0      0     c0121fc0 00000000 S bdi-default
root      23    2     0      0     c00635b0 00000000 S kblockd
root      24    2     0      0     c038ba38 00000000 S khubd
root      26    2     0      0     c00635b0 00000000 S cfg80211
root      27    2     0      0     c0563450 00000000 S pmic_thread_kth
root      28    2     0      0     c00635b0 00000000 S emi_mpu
root      29    2     0      0     c0119344 00000000 S kswapd0
root      30    2     0      0     c0185880 00000000 S fsnotify_mark
root      31    2     0      0     c024a310 00000000 S ecryptfs-kthrea
root      32    2     0      0     c00635b0 00000000 S crypto
root      46    2     0      0     c00637c0 00000000 S kworker/u:1
root      53    2     0      0     c00635b0 00000000 S uether
root      54    2     0      0     c00635b0 00000000 S binder
root      55    2     0      0     c0057184 00000000 S hang_detect
root      56    2     0      0     c03355a4 00000000 S ion_mm_heap
root      58    2     0      0     c044c010 00000000 S bat_thread_kthr
root      59    2     0      0     c044ae38 00000000 S mtk charger_hv_
root      60    2     0      0     c045ea48 00000000 S btif_rxd
root      61    2     0      0     c0521af4 00000000 S conn-md-thread
root      62    2     0      0     c00635b0 00000000 S mtk_vibrator
root      63    2     0      0     c07a2fe4 00000000 S krfcommd
root      64    2     0      0     c05d2284 00000000 S disp_config_upd
root      65    2     0      0     c0057184 00000000 S esd_recovery_kt
root      66    2     0      0     c05b4584 00000000 S disp_captureovl
root      67    2     0      0     c05b2f10 00000000 S disp_capturefb_
root      68    2     0      0     c03f903c 00000000 S mmcqd/0
root      69    2     0      0     c03f903c 00000000 S mmcqd/0boot0
root      70    2     0      0     c03f903c 00000000 S mmcqd/0boot1
root      71    2     0      0     c05b51a8 00000000 S disp_config_upd
root      72    2     0      0     c05b1500 00000000 S disp_clean_up_k
root      73    2     0      0     c05b31a0 00000000 S disp_ovl_kthrea
root      74    2     0      0     c00635b0 00000000 S accdet
root      75    2     0      0     c0600e4c 00000000 S keyEvent_send
root      76    2     0      0     c00635b0 00000000 S accdet_eint
root      78    2     0      0     c00635b0 00000000 S accdet_disable
root      79    2     0      0     c00635b0 00000000 S sensor_polling
root      80    2     0      0     c03f903c 00000000 S mmcqd/1
root      83    2     0      0     c0529c0c 00000000 S mtk-tpd
root      96    2     0      0     c00635b0 00000000 S deferwq
root      97    2     0      0     c00635b0 00000000 S f_mtp
root      98    2     0      0     c03b23d4 00000000 S file-storage
root      99    2     0      0     c0057184 00000000 S wdtk-0
root      100   2     0      0     c0057184 00000000 S wdtk-1
root      101   2     0      0     c0057184 00000000 S wdtk-2
root      102   2     0      0     c0057184 00000000 S wdtk-3
root      195   2     0      0     c022abf8 00000000 S jbd2/mmcblk0p7-
root      196   2     0      0     c00635b0 00000000 S ext4-dio-unwrit
root      206   2     0      0     c022abf8 00000000 S jbd2/mmcblk0p6-
root      207   2     0      0     c00635b0 00000000 S ext4-dio-unwrit
root      210   2     0      0     c034eca8 00000000 S loop0
root      213   2     0      0     c022abf8 00000000 S jbd2/loop0-8
root      214   2     0      0     c00635b0 00000000 S ext4-dio-unwrit
root      283   2     0      0     c022abf8 00000000 S jbd2/mmcblk0p5-
root      284   2     0      0     c00635b0 00000000 S ext4-dio-unwrit
root      468   1     568    4     c01594fc 0001bfac S /sbin/ueventd
root      476   2     0      0     c022abf8 00000000 S jbd2/mmcblk0p2-
root      477   2     0      0     c00635b0 00000000 S ext4-dio-unwrit
root      480   2     0      0     c022abf8 00000000 S jbd2/mmcblk0p3-
root      481   2     0      0     c00635b0 00000000 S ext4-dio-unwrit
system    483   1     1812   360   c064b0b4 b6f208fc S /system/bin/drvbd
ccci      484   1     1940   632   c0472460 b6eb5c08 S /system/bin/ccci_fsd
system    485   1     1960   672   c046d774 b6f86944 S /system/bin/ccci_mdinit
root      487   1     48320  10528 ffffffff b6ef7f88 S /system/bin/factory
system    489   1     1500   504   c01594fc b6ec3e40 S /system/bin/6620_launcher
install   493   1     1556   540   c064b0b4 b6f1f8fc S /system/bin/installd
root      494   1     4628   232   ffffffff 0001bea4 S /sbin/adbd
root      500   2     0      0     c04af404 00000000 S mtk_stp_psm
root      501   2     0      0     c04af404 00000000 S mtk_stp_btm
root      502   2     0      0     c04af1e0 00000000 S mtk_wmtd
root      503   2     0      0     c00635b0 00000000 S fm_timer_wq
root      504   2     0      0     c00635b0 00000000 S fm_eint_wq
shell     560   1     7940   852   ffffffff b6ed9500 S /system/bin/mdlogger
root      665   487   0      0     c004c39c 00000000 Z libmnlp_mt6582
root      707   2     0      0     c00637c0 00000000 S kworker/0:2
root      744   2     0      0     c00637c0 00000000 S kworker/0:0
root      833   494   1480   556   c0011d10 b6e8f78c S /system/bin/sh
root      838   833   1800   548   00000000 b6ef2944 R ps
The Factory Mode environment consists of the /system/bin/factory process and a short list of other processes, mainly ADB and MediaTek drivers. /system/bin/factory is written in C++, directly accesses /dev/graphics/fb0 and, as expected, links against pretty much every hardware access library on the system:
/system/lib/lib3a.so
/system/lib/libEGL.so
/system/lib/libGLES_trace.so
/system/lib/libGLESv2.so
/system/lib/libJpgEncPipe.so
/system/lib/libacdk.so
/system/lib/libaed.so
/system/lib/libaudio.primary.default.so
/system/lib/libaudiocompensationfilter.so
/system/lib/libaudiocomponentengine.so
/system/lib/libaudiocustparam.so
/system/lib/libaudiodcrflt.so
/system/lib/libaudiosetting.so
/system/lib/libaudioutils.so
/system/lib/libbessound_hd_mtk.so
/system/lib/libbessound_mtk.so
/system/lib/libbinder.so
/system/lib/libblisrc.so
/system/lib/libblisrc32.so
/system/lib/libbluetoothdrv.so
/system/lib/libbwc.so
/system/lib/libc.so
/system/lib/libcam.campipe.so
/system/lib/libcam.camshot.so
/system/lib/libcam.exif.so
/system/lib/libcam.utils.sensorlistener.so
/system/lib/libcam.utils.so
/system/lib/libcam_mmp.so
/system/lib/libcam_utils.so
/system/lib/libcamalgo.so
/system/lib/libcamdrv.so
/system/lib/libcamera_client.so
/system/lib/libcamera_metadata.so
/system/lib/libcameracustom.so
/system/lib/libcorkscrew.so
/system/lib/libcrypto.so
/system/lib/libcustom_nvram.so
/system/lib/libcutils.so
/system/lib/libcvsd_mtk.so
/system/lib/libdpframework.so
/system/lib/libdrmframework.so
/system/lib/libdrmmtkutil.so
/system/lib/libdrmmtkwhitelist.so
/system/lib/libdsyscalls.so
/system/lib/libexpat.so
/system/lib/libext4_utils.so
/system/lib/libfeatureio.so
/system/lib/libfile_op.so
/system/lib/libgabi++.so
/system/lib/libgccdemangle.so
/system/lib/libgui.so
/system/lib/libhardware.so
/system/lib/libhardware_legacy.so
/system/lib/libhwm.so
/system/lib/libicui18n.so
/system/lib/libicuuc.so
/system/lib/libimageio.so
/system/lib/libimageio_plat_drv.so
/system/lib/libion.so
/system/lib/libjpeg.so
/system/lib/liblog.so
/system/lib/libm.so
/system/lib/libm4u.so
/system/lib/libmatv_cust.so
/system/lib/libmedia.so
/system/lib/libmp4enc_sa.ca7.so
/system/lib/libmsbc_mtk.so
/system/lib/libmtk_drvb.so
/system/lib/libmtkjpeg.so
/system/lib/libmtklimiter.so
/system/lib/libmtkshifter.so
/system/lib/libnativehelper.so
/system/lib/libnetutils.so
/system/lib/libnvram.so
/system/lib/libnvram_platform.so
/system/lib/libnvram_sec.so
/system/lib/libpower.so
/system/lib/libpowermanager.so
/system/lib/libsched.so
/system/lib/libselinux.so
/system/lib/libsonivox.so
/system/lib/libsparse.so
/system/lib/libspeech_enh_lib.so
/system/lib/libspeexresampler.so
/system/lib/libssl.so
/system/lib/libstagefright_foundation.so
/system/lib/libstdc++.so
/system/lib/libstlport.so
/system/lib/libsync.so
/system/lib/libui.so
/system/lib/libutils.so
/system/lib/libvc1dec_sa.ca7.so
/system/lib/libvcodec_oal.so
/system/lib/libvcodec_utility.so
/system/lib/libvcodecdrv.so
/system/lib/libvp8dec_sa.ca7.so
/system/lib/libwpa_client.so
/system/lib/libz.so
If you find out more about the Factory Mode on this device, please find me on Launchpad.net and get in contact.
